Sunday, November 25, 2007

INTERIOR DETAILS OF THE VW BUS

I did the dash with added details like knobs and the dash bar done with stretched sprue. I also opened the ashtray and threw in some butts. You can notice as well the seat cover that was done with the fabric from an old pair of cotton shorts. It was simply glued on the seat using white glue after cutting it to shape. Nothing is glued in yet in the interior of the model and I also have to do some more interior details.


CLEAR COATS, DECALS AND DETAIL WASH ON THE BUS

Shot the bus with Krylon clear gloss to install the decals and do a wash for the scribbed lines. I then gave it a clear matt coat (Krylon again) 24 hours later. This was not done without some amount of stress. Last time I used Krylon clear was on a Tamiya Porsche 911 GT2 full of decals and the entire thing went orange peel on me! This time I used the "craft" Krylon clear rattle cans and besides being worried after the last matt clear coat looked kinda white, it all dried up real nice. As you can see in the last image of the hub caps, I use artist oils to do my wash. They have the finest pigments and it really brings up the details.


After applying the matt clear coat.

Hub cap on the far right is without the wash detailing

Monday, November 19, 2007

UPDATE ON THE BODY WORK AND PAINT OF THE BUS


I shot the bus with Tamiya semi gloss black for the primer. I then dry brushed Humbrol rust color all over. I then brushed in a baby blue flat paint, which I wet sanded after it was dry. I again did some dry brushing with Humbrol rust paint over the blue. Dry brushing is going over your model with a brush that is wiped almost dry of paint. It takes a long time, but the results are pretty cool. I am not done yet. There are still at least 3 more paint coats before the finish is done.

Gerry

Wednesday, September 5, 2007

STARTING THE VW BUS RAT PROJECT


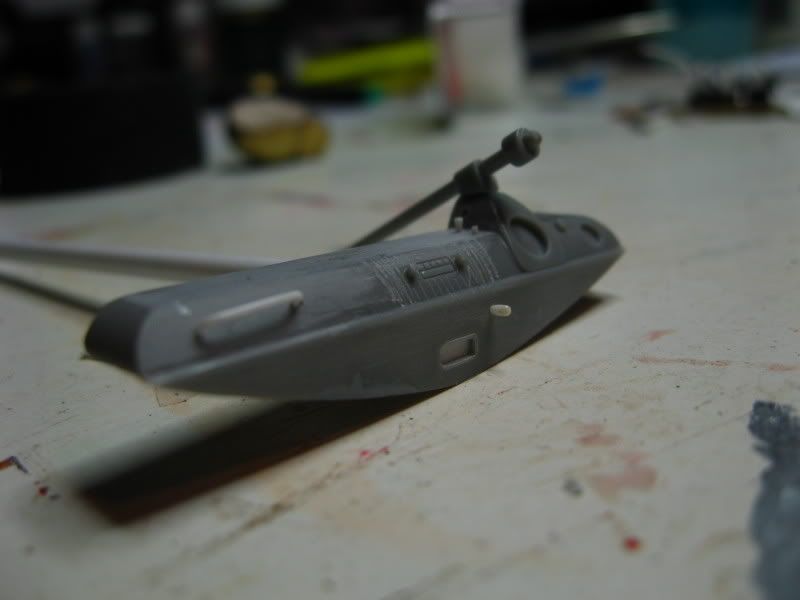
I went out and bought myself a Hasegawa 1/24 type 2 VW van kit and plan on building a rat bus. The finish will be truly used up and rusted. I also want this thing to sit low in the weeds. The kit is a curbside model, meaning that it doesn't have a detailed engine and open hood. I started by lowering the drivetrain by cutting into the frame and lowering the rear suspension. The other thing I did was equip the van with smaller tires so I could clear the wheel wells. I then applied a rust finish to the underbody, this is how I did it.

First step was to paint the frame semi gloss black. Next I dry brushed the entire thing with rust paint from Testors. Drybrushing is done by removing almost all the paint from your brush on a piece of paper until you only have color pigments on it. I then drybrushed steel color paint from Testors all over. After leaving everything to dry overnite, I applied a mixture of brown with a little yellow of dry pastel powder with a dry brush from a make up kit. Apply as much as you need to get the wanted effect. If it doesn't work, simply run the piece under a water tap and start over.

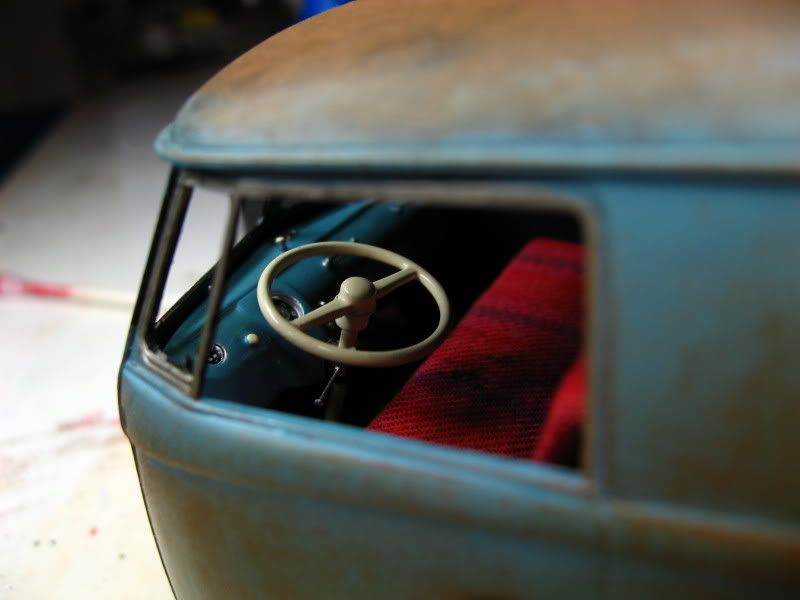
The roof rack you see was made with small styrene rods and the planks are actual wood cut to size and stain with a mix of flat Humbrol clear with a touch of brown pastel. If you want to buy pastels for weathering, buy the dry pastel and not the oil ones.

Keep posted for the next post. :)

Gerry